‘Baath Cake’/ Goan Coconut cake topped with toasted fresh coconut

IMG_9927

‘Baath Cake’/ Goan Coconut cake topped with toasted fresh coconut


Seasons Greetings everyone!

I hope you’ve all had a very Merry Christmas and are all set to gear up for the New year?

Merry Christmas and a Happy New Year 2015!

Merry Christmas and a Happy New Year 2015!

Having not being able to visit the family this year, I have been celebrating the festive season with near and dear friends who have spoilt me with delicious food and gifts. While growing up in India and Kuwait, it was not uncommon for fellow Indians, particularly Goans and Mangloreans, to exchange home made Christmas sweets or “Kuswar” during this festive season. I did receive some from a couple of my Indian friends here – the M & M’s, which reminded me of the traditions back home.

It is often a competition, to some extent, of who can make the most amount of sweets and the best tasting sweets, but all in good spirits of course. Mum, my grandmother (Mum’s side), my sister and I would often begin preparing large quantities of these sweets on weeknights after school or work in November staying up late to odd hours of the night in order to be able to begin distributing plates of these to close friends and family in early Dec with visits to their home for a cuppa and to drop off/ exchange sweets and wish them the seasons greetings. The best part would be after you came back home and had all these sweets to try out from what people had given back to you and it was interesting to taste variations in recipes of several of these Christmas sweets.

While there are several of these recipes that I love, my favourite one has always been the “Baath cake” or Goan coconut cake. So this year, I decided to make Mum’s recipe my own and reminisce with some of my fondest Christmas memories.

While this is a Goan Christmas recipe, it could quite easily be enjoyed throughout the year if you’re a fan of moist and fluffy coconut cake.


Baath cake/ Goan Coconut Cake

Adapted from – my Mum
(Serves 12-15)

Ingredients:

2 and 1/4 cups fresh finely grated coconut (preferred) OR desiccated coconut
2 cups Sugar
2 cups Semolina (also known as ‘Rawa‘)
8 Eggs – separated (whites and yolks)
1 tsp Baking Powder
1 tsp Vanilla Essence
300gm Butter (melted)
1/4 tsp Nutmeg powder (optional)
1/2 tsp Cinnamon powder (optional)
1 tsp Rosewater (optional)

IMG_9907

Butter to be melted

IMG_9908

Separate 8 eggs

IMG_9909

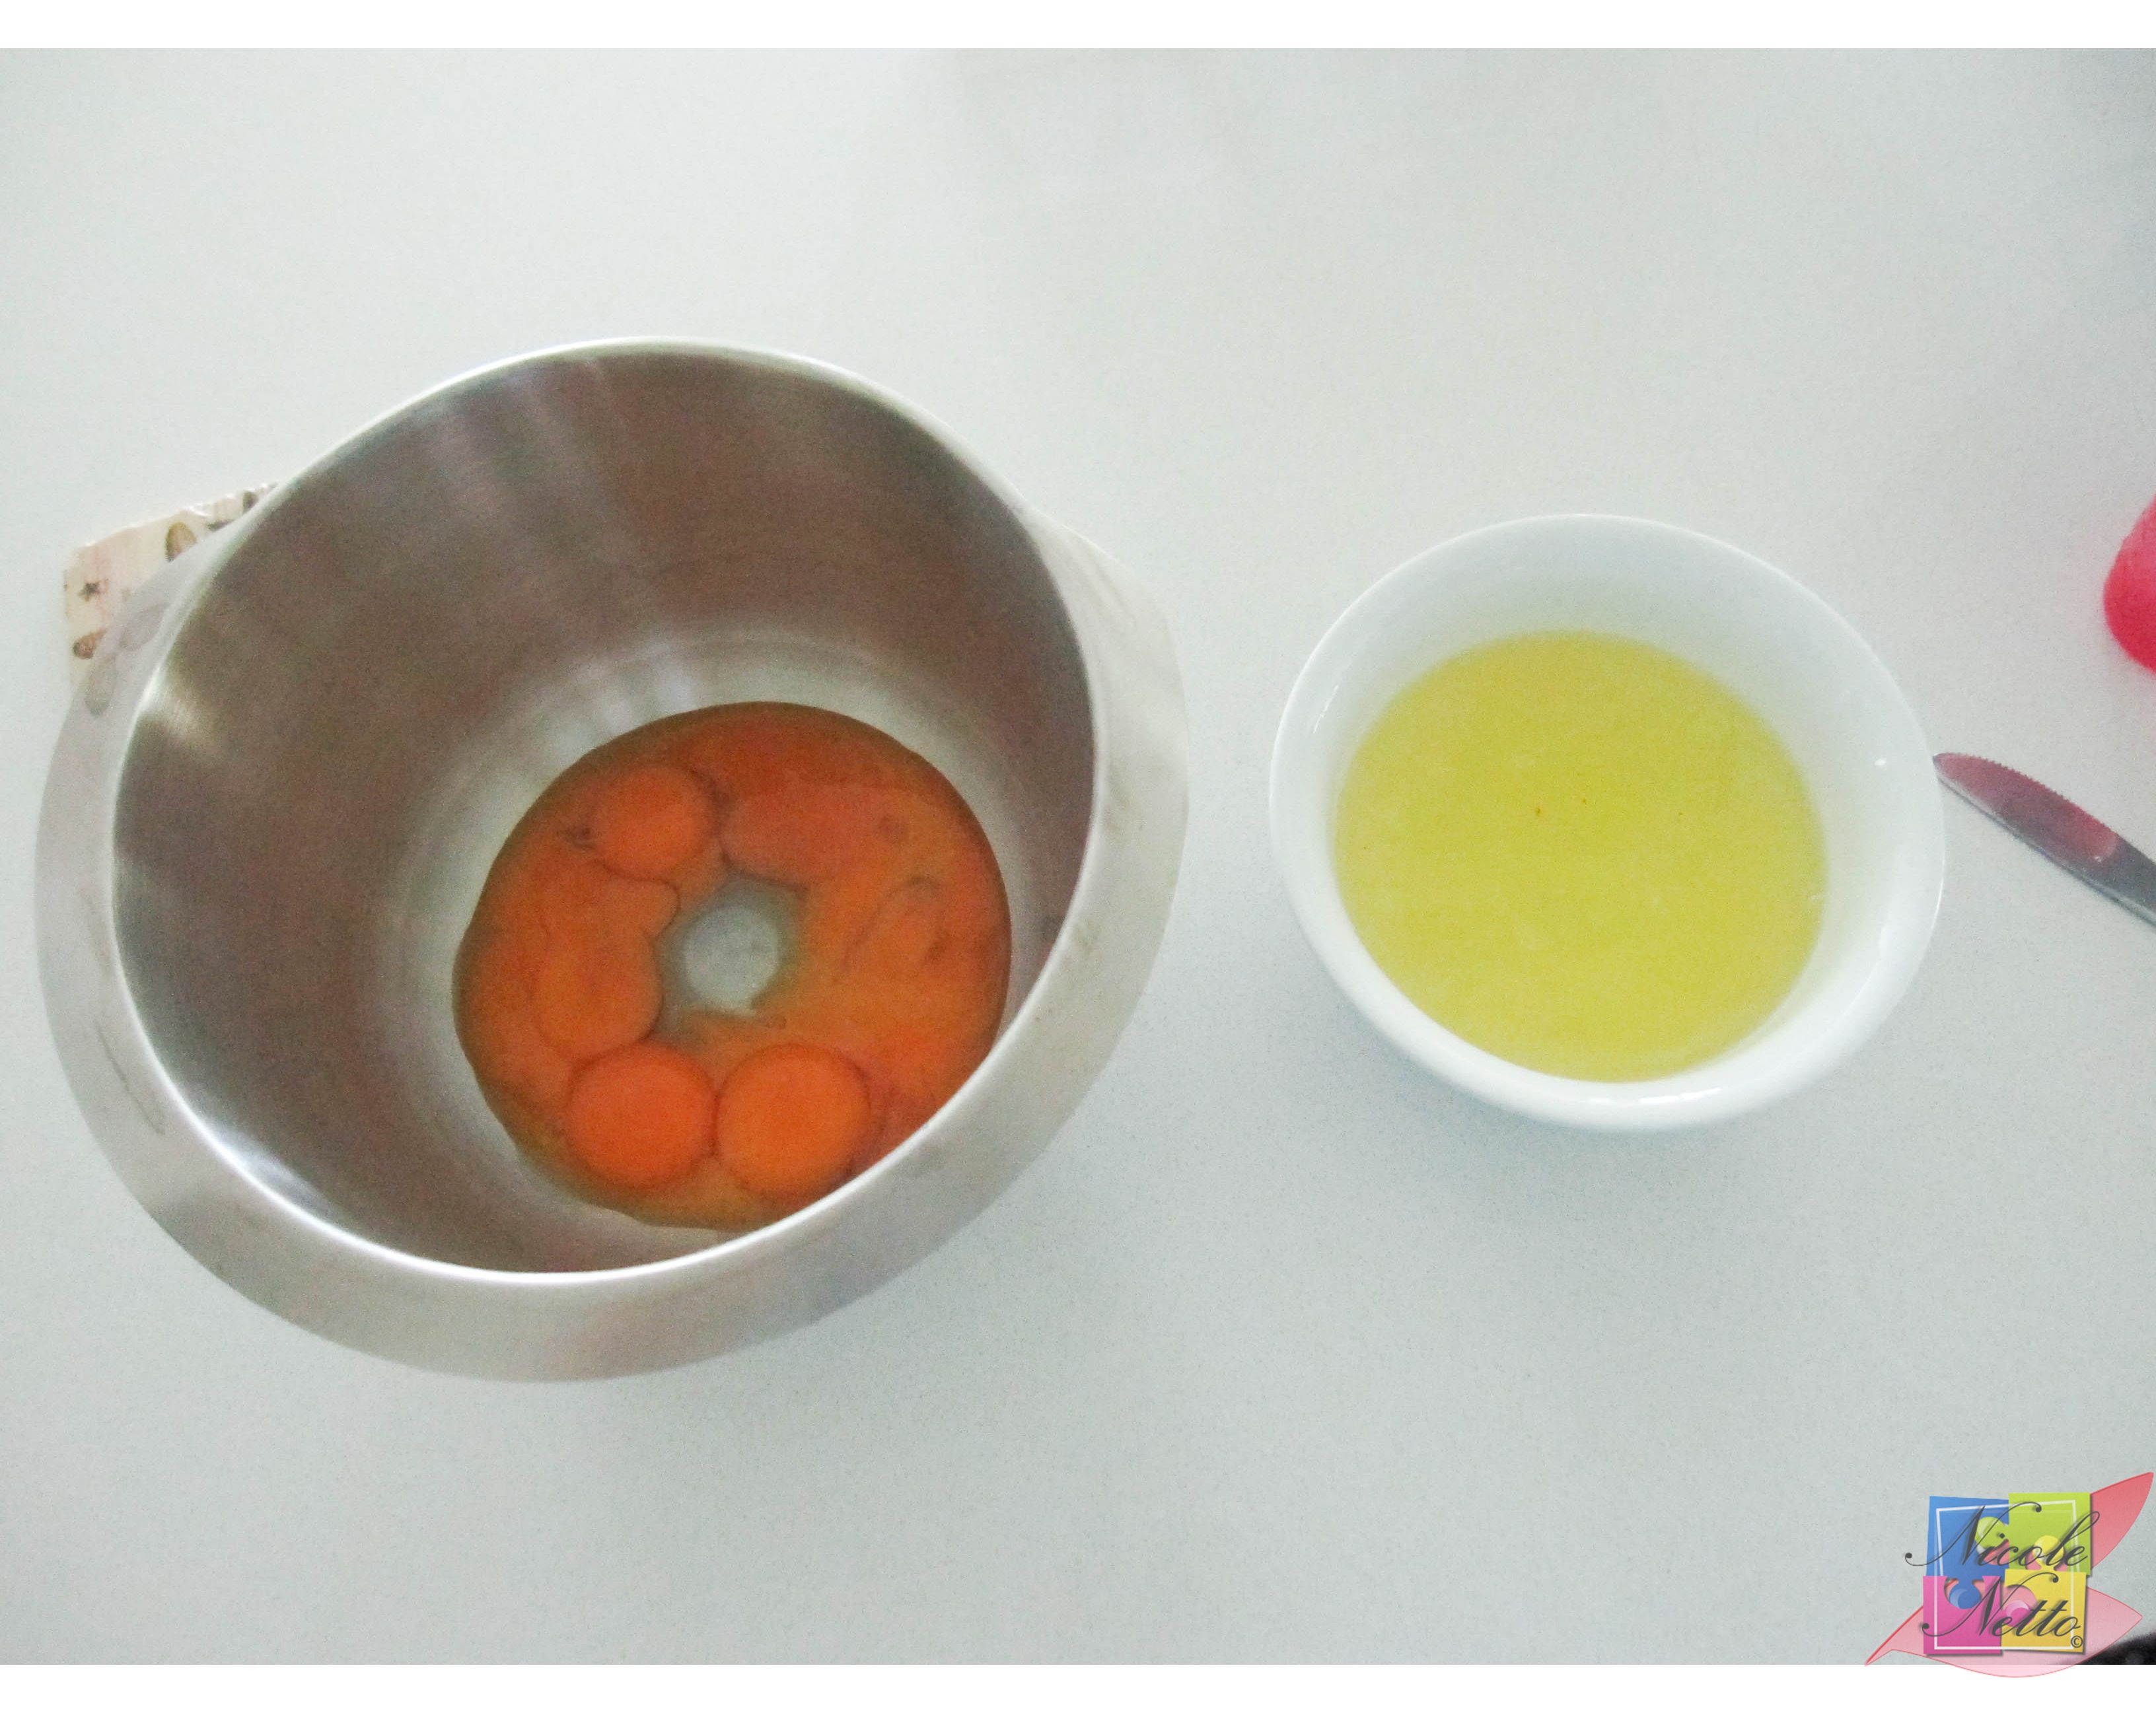
Separated eggs yolks and whites


Method:

Mix the butter, egg yolks while adding in the sugar gradually.

Butter, egg yolks and sugar mixture

Butter, egg yolks and sugar mixture

Next add in the semolina a little at a time, followed by the 2 cups of grated/ desiccated coconut. The batter should start to get quite thick at this stage.

Lastly add beaten egg whites (to soft peaks) and fold in gently. Make sure the batter in mixed evenly.

IMG_9914

Beaten egg whites

IMG_9915

Gently fold in beaten egg whites into batter


Cover and leave this batter to rest aside for a minimum of 3 hours. 6 hours – overnight is preferred – this step allows the semolina to soak in the moisture and fluff up.

When you’re ready to bake, pour the batter into a suitably sized baking dish and spread evenly.

IMG_9917

Pouring batter into a suitably sized baking dish

IMG_9918

Batter spread evenly


Spread the remaining 1/4 cup of grated fresh coconut or desiccated coconut evenly over the top of the batter.

IMG_9920

Fresh coconut sprinkled on top

IMG_9919

Baath batter topped with fresh coconut


Preheat the oven to 200ºC and bake the mixture for 25 mins – the cake should progress slowly to a beautiful golden brown.

IMG_9921

Light golden brown

IMG_9922

Medium golden brown


After the 25 mins have elapsed, check if the batter is cooked by inserting a clean butter knife – if it comes out clean, the cake is ready – else you might need to bake it for a few more minutes. The coconut spread on the top should have toasted in the oven, if it hasn’t, broil the cake for a couple of minutes.

IMG_9923

Golden brown baked cake

IMG_9924

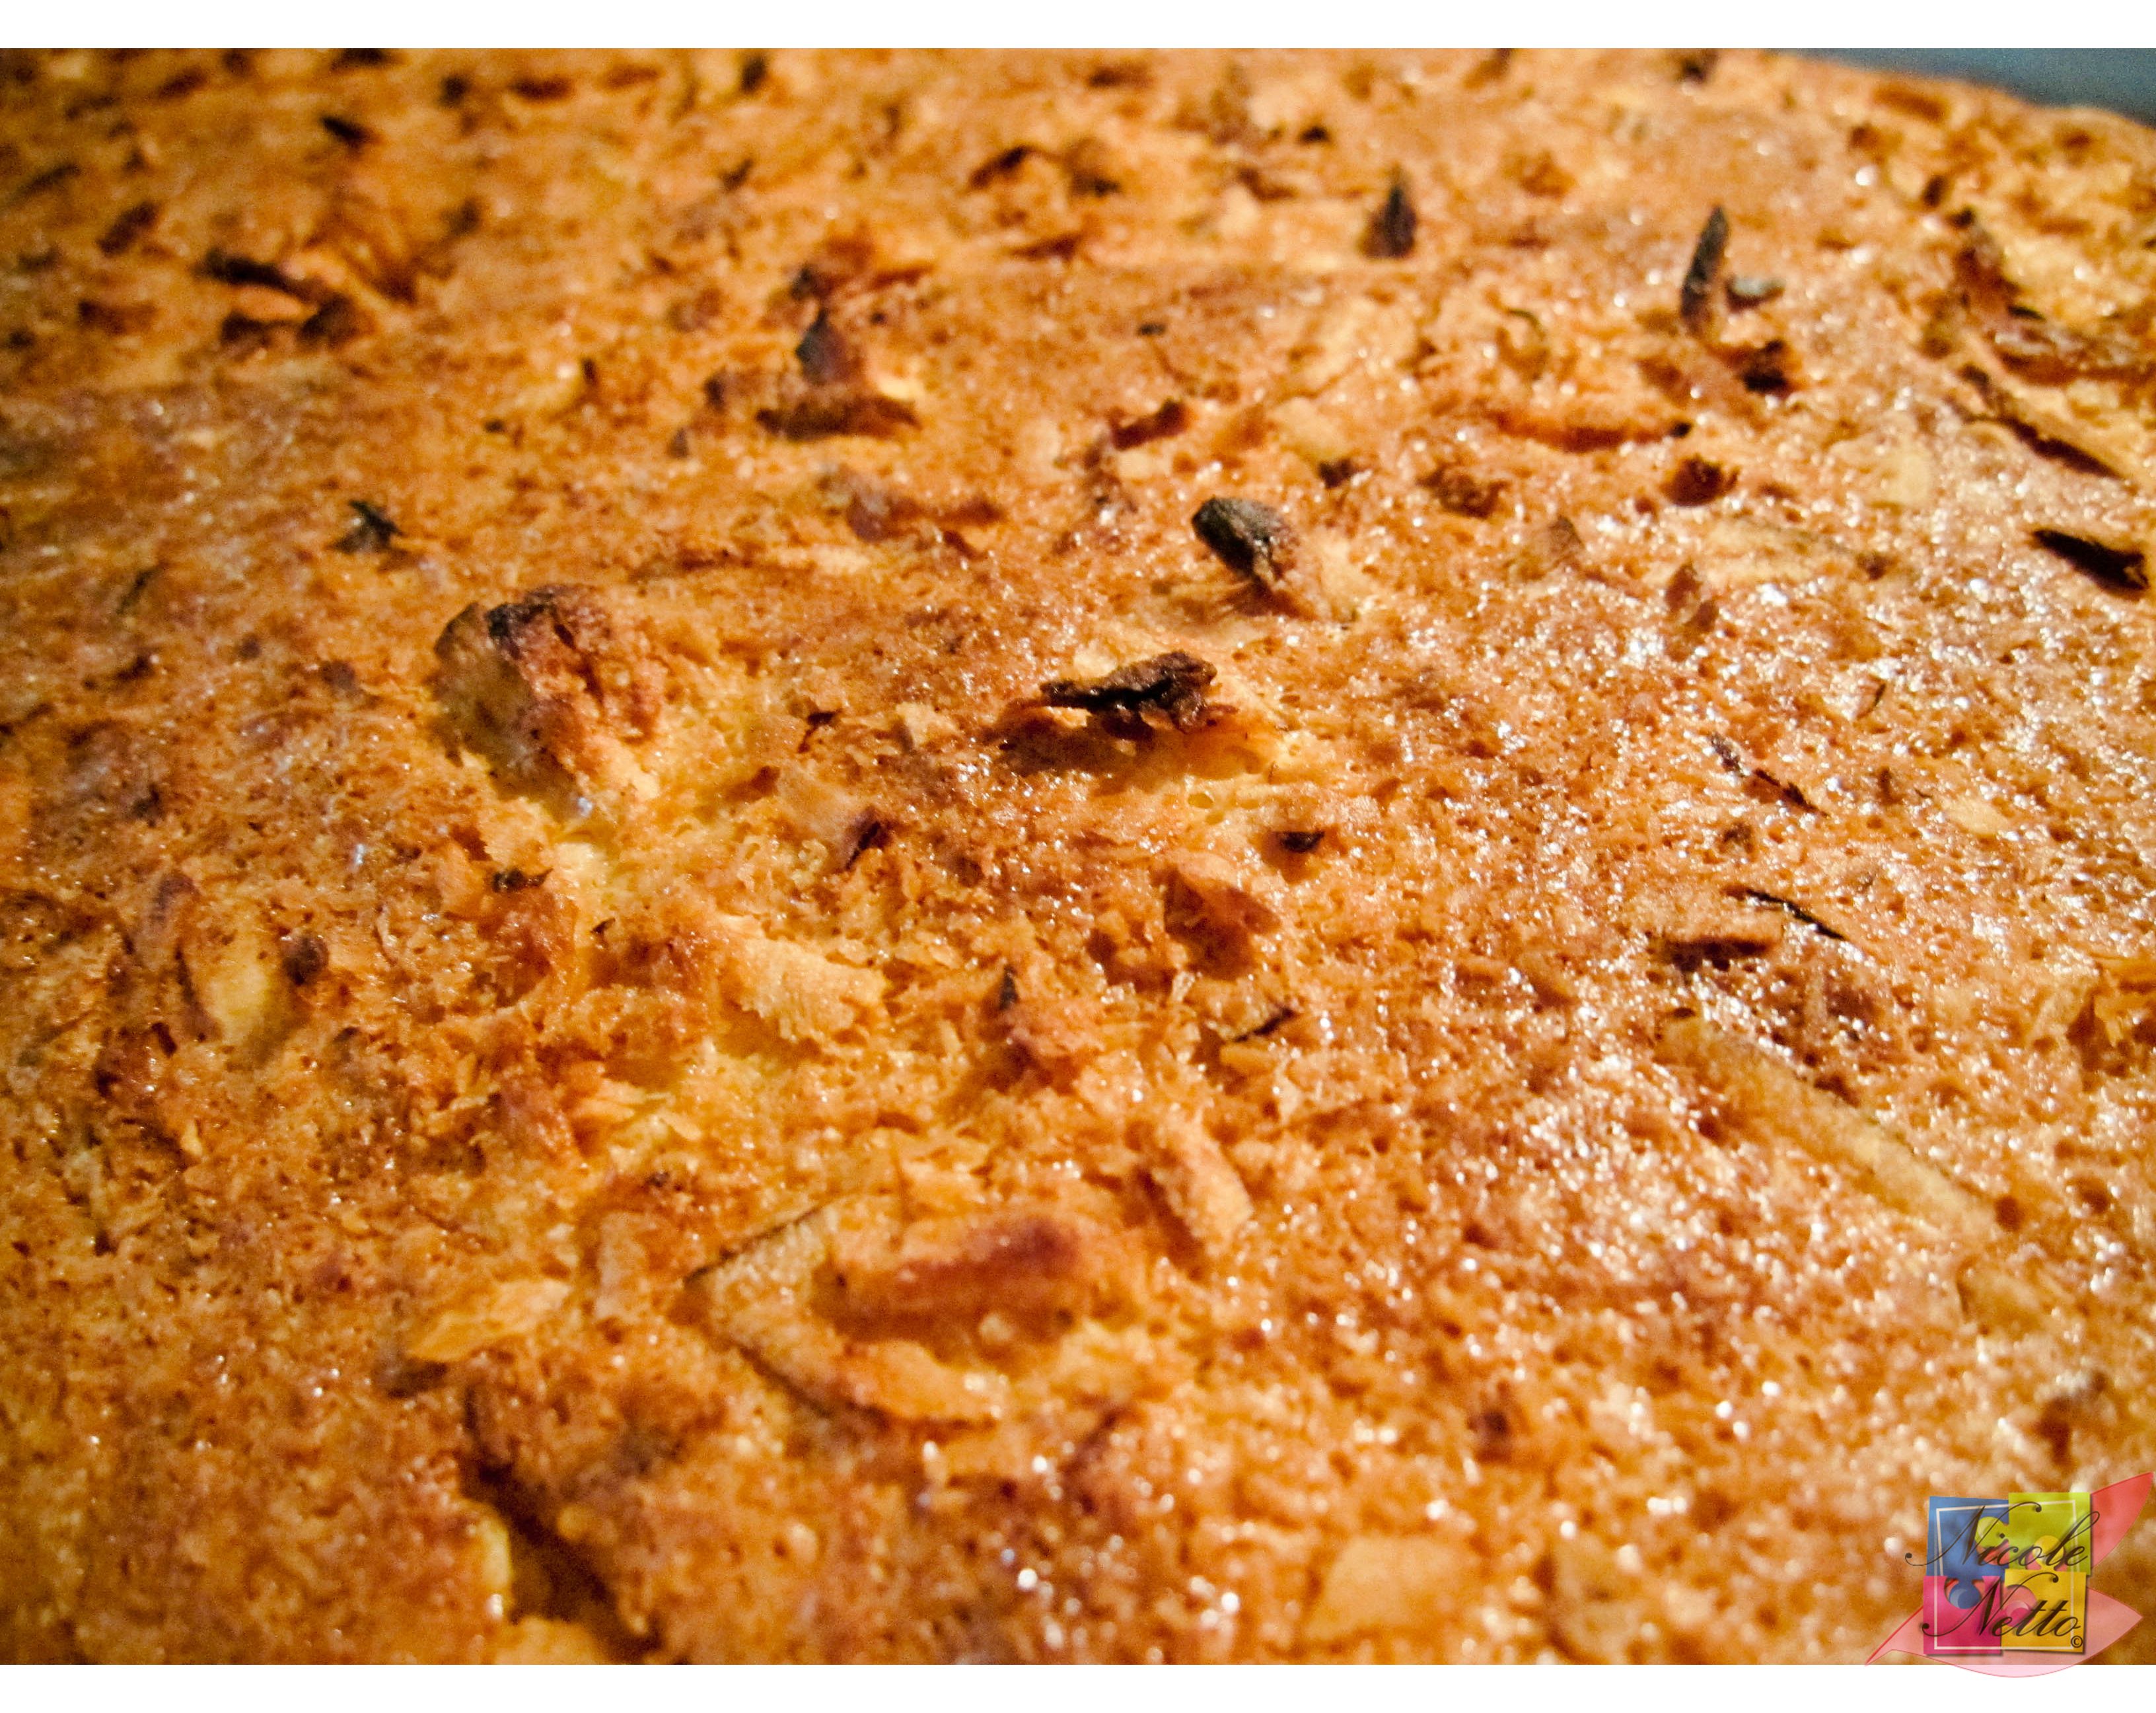
Toasted coconut topping


Remove the cake and set aside to cool slightly. This cake is best served at warm to room temperature.


Serving suggestions:

This cake is great served on it’s own, accompanied by a good cup of tea (preferably Masala Chai) or alternatively with some ice cream. I’ve served it both ways.

Suggested ice cream flavours if you decide to go the ice cream route –

Vanilla:

IMG_9925

Moist and fluffy Baath cake with Vanilla ice cream


Mango and Coconut:

I have to say this version was my favourite. I also did have a nice cup of tea on the side.

bathcake

Moist and fluffy Baath cake with Mango and Coconut ice cream


I do hope you enjoy this cake as much as I do!

Snapper en croûte de sel (Snapper in Salt Crust)

IMG_9898

Snapper in salt crust


The selection of this recipe for our first challenge for “The French Diaries” was done by my friend D. I don’t usually cook fish too often and was up for the challenge as the ingredients sounded like a beautiful medley of flavours.

Let me just start by saying, I didn’t expect the fish to taste as great as it did! Every mouthful was juicy, moist and delicious! It absorbed all the flavour from the parsley, golden shallots and sliced lemon stuffed within it and a perfectly balanced amount of flavour from the herbed salt crust dough. Cooking the fish well sealed within the dough left the fish flesh very moist and flaky.

This recipe is suited to any decent sized round fish, such as snapper, barramundi or black bream, cleaned with scales left on. Leaving the scales on stops the salt from the dough from infusing the flesh too much and also helps prevent the crust from sticking to the flesh. Do not consume the salt crust after cooking, this is to be discarded.

Although the recipe seems like it would be quite intimidating, it is really quite simple.

I used a red snapper about 500 gm in weight since I was cooking for one. I would allow for about 1/2 kg per person or serve – and adjust the recipe based on the fish size and required number of servings.

Please ensure fresh fish selection – with seafood. It’s generally best to cook it the same day that you purchase it. If it is not possible to cook it on the same day, please clean the fish and observe safe storage and handling and try to cook with fish within 2 days at most as this dish relies on the fish’s natural flavour.

Snapper en croûte de sel / Snapper in Salt Crust:

Adapted from “French for Everyone” by Manu Feildel
(Serves 4)

Ingredients – Fish:

1 barramundi (2 Kg), snapper OR black bream (cleaned with scales left on)
15 sprigs flat-leaf parsley
3 Golden shallots, thinly sliced
1 Lemon sliced
Sea salt and freshly ground black pepper (for seasoning)

Ingredients – Salt crust dough:

1 Kg Plain flour
1 Kg Coarse rock salt
2 Tbsp Thyme Leaves
1/3 cup OR 2 Tbsps Fennel seeds
650ml of water

Method:

Remove all the fish fins. If the fish is too large to fit into your oven, remove the head.

saltcrust

Red Snapper

IMG_9878

Snipping off fins

IMG_9879

Removing the dorsal fin


Stuff the fish cavity with the parsley, golden shallots and lemon and season the cavity with salt and pepper. If you have a bit of time, lightly sautee these ingredients prior to stuffing the fish to get the flavours going – be sure to pour and juices that escape inside the fish cavity. Set aside.

Flat leaf parsley, Golden shallots, Lemon, Salt, Pepper

Flat leaf parsley, Golden shallots, Lemon, Salt, Pepper

Prepped fish ingredients

Prepped fish ingredients

Stuffing fish cavity

Stuffing fish cavity


Preheat your oven to 220ºC. Line a baking tray or large baking pan with baking paper.


For the salt crust dough, mix all the ingredients a little at a time to form a pliable dough. This takes a little bit of patience. Because of the salt content, the dough can be quite delicate and form cracks/ holes easily, so be sure to handle with care, especially while rolling out.

IMG_9885

Salt crust dough prep

IMG_9886

Mixing the salt crust dough ingredients

IMG_9888

One half of the salt crust dough ready to be rolled out


Divide the dough in half and roll out to form 2 even 5mm thick rectangular sheets (about 60cm x 20cm). The pieces should be 5cm larger than the fish all the way around to allow for sealing well (I rolled out the dough into an oblong shape about the shape of the fish while leaving about 3cm all around to make this and the following steps a bit easier).

Stuffed fish placed on rolled out dough on lined baking tray

Stuffed fish placed on rolled out dough on lined baking tray

Place one rectangle on the lined baking tray or large roasting pan. Carefully place the fish over this. Outline the fish on the first rolled out rectangular sheet with water. Then place the second rolled out rectangular sheet carefully over the top of the fish and seal the edges all around well by tightly sealing the fish all around.

IMG_9891

Well sealed stuffed fish with 3cm border


Cut the dough around the fish (be careful not to damage your roasting pan OR baking tray – perhaps cut the dough on a cutting board prior to transferring the sealed fish to the lined baking dish if it makes this process easier), leaving a 3cm border on all sides.


Bake the fish at 220ºC for 40 minutes or until the crust is light golden and the fish is cooked through. Personally, I had to leave the fish in for about 50 mins as the dough on the inside felt like it wasn’t cooked through on the inside.

IMG_9893

Fish being baked

IMG_9895

Salt crusted fish almost ready

IMG_9896

Cooked Salt crusted fish


Cut around the edge of the top layer of crust, carefully. This process was a little hard as the salt crust hardens quite a bit, which is good news really as all the flavours and moistness would be well retained. A meat mallet might be required for this process, to break the crust.

Carefully removed and discard the skin and salt crust. The lovely flavoured fish, golden shallots and lemon is ready to serve.

IMG_9898

Cracked open salt crusted snapper

IMG_9900

Peeled off skin and flaky moist fish

IMG_9899

Ready to serve!

IMG_9901

Flesh is so moist that it flakes off so easily!


Please do let me know if you try out this recipe and what you think about it.

Vanilla Fluffy Pancakes with Banana frozen yogurt, Lemon zest and Brandy whipped cream, Maple syrup and fresh berries

Fluffy Pancakes and yummies

So I had one of my friend’s visit and stay over. After an elaborate meal the previous night and since I didn’t get a chance to make the dessert that I had originally planned to make (Banana froyo with Salted caramel sauce), I felt like making a nice big brekky for the two of us and had my friend (F) help me out as well.

F got me some fresh strawberries and blueberries and I had already pre-frozen cut up bananas to make fresh banana froyo – so pancakes seemed like the perfect complimentary option.

Sweet brekky spread

I hope you enjoy my recipe and making it as much as I do – always a fun option when you have company –

Vanilla Fluffy Pancakes:

(Serves 4)

Ingredients –

1 and 1/3 cups OR 200 gm Plain flour
1 tsp Bicarbonate soda
1/4 cup OR 50 gm firmly packed cup of Brown sugar
1 whole Egg (beaten)
1 Egg white (separated and whisked with a pinch of salt to soft peaks)
1 tsp Vanilla extract
300ml Buttermilk
25gm Unsalted butter (melted)

Method –

Sift flour and bicarbonate soda in a bowl and stir in the sugar.  Add in the beaten egg, vanilla extract and buttermilk and hand whisk between each added ingredient to a smooth consistency with no lumps.

Carefully fold in the whisked egg whites to this mixture.

Heat a non-stick crepe pan or frypan over medium heat and brush the base with a little melted butter. Use a large ladle or large serving spoon to pour in one scoop per pancake. Do not over crowd the pan, if you only have enough space for one pancake at a time, then cook only one pancake at a time. Cook each pancake for 1-2 minutes until bubbles appear on the surface. Turn/ Flip over carefully and cook for a further 1 min or until golden. Remove cooked pancakes and stack aside.

Continue until pancake batter has been used up completely.


Banana Frozen Yoghurt:

I was inspired to try this out from an image I saw on Pinterest. You need a strong blender that is capable of blending ice for this recipe. The following is my attempted recipe.

(Serves 4)

Ingredients –

4 sliced (about 0.5cm thick slices) bananas (My suggestion is 1 per person, but feel free to adjust quantities to your liking)
4 Tbsp Greek Yoghurt OR Naturally Sweetened Breakfast Yoghurt (the thicker the better!)
1/2 cup Sugar (can be adjusted to your liking – I suggest adding in a little at a time)
4  Tbsp Honey (can be adjusted to your liking – I suggest adding in a little at a time)
1/2 tsp yellow food colouring

Method:

Freeze the sliced bananas in the freezer the previous night.

When you’re ready to make the frozen yoghurt, it’s just a matter of blending all the ingredients together in a strong blender – yes, it’s that simple! My suggestion is to add in a little at a time.

The way I went about it is as follows:

Start with about 1/4 of the total sliced frozen bananas, 2 Tbsp yoghurt, 1/4 cup Sugar, 2 Tbsp Honey and 1/2 tsp yellow food colouring and blend.

Next add in about 1/4 of the total sliced frozen bananas, 1 Tbsp yoghurt (be mindful of quantity being added depending on consistency of yoghurt as you want the finished frozen yoghurt to be thick and not melted/ liquefied), the remaining sugar and 2 Tbsp Honey.

Next add in the remaining bananas a little at a time, adjust with yoghurt for desired consistency and sugar or honey for desired sweetness level. When you’re happy with the taste, the frozen yoghurt is ready!

Transfer to a freeze proof container and put into freezer until you’re ready to serve breakfast.


Lemon zest and Brandy whipped cream:

(Serves 4)

Ingredients:

300ml chilled Thickened/ Pouring cream
1/4 cup Sugar (you can increase the quantity if you want it to be sweeter)
1 tsp Brandy essence OR 1 tsp Brandy
1 tsp Lemon zest (Fresh grated)

Method:

Whisk all the ingredients together with a hand whisk or electric mixer until it forms soft peaked whipped cream.

Note: It’s important to ensure the thickened cream is chilled.


Suggested condiments and accompaniments:

– 1 punnet Strawberries sliced
– 1 punnet Blueberries
– Maple syrup
– Honey
– Butter


Fluffy Pancake goodness

Fluffy Pancake goodness with delicious yummies

Do let me know if you try this recipe out and what you thoughts are about it! Enjoy!